 , Coding
  , and Thinking
今天老司机代理莫名其妙变的超级卡,不知道什么原因,想现在本机上测试一下,所以得在自己电脑上安装stunnel先。
1. 使用homebrew安装stunnel
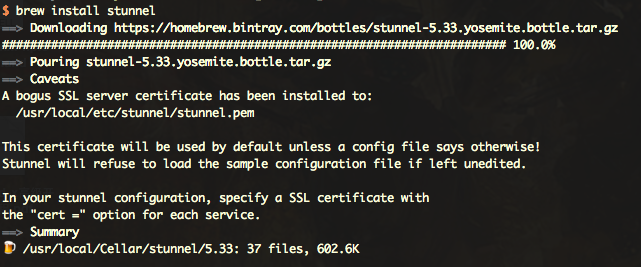
2. 添加证书
在上面的安装结果中可以看到,stunnel的配置目录在/usr/local/etc/stunnel下面。
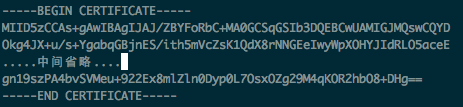
因为我要用本机做stunnel-client,所以在该目录下新建一个stunnel-server.pem文件。再把server端的证书拷贝过来,我是直接打开server端的stunnel.pem,然后将里面CERITIFICATE拷贝到stunnel-server.pem文件中。
3. 修改配置文件
编辑/usr/local/etc/stunnel/stunnel.conf文件
; It is recommended to drop root privileges if stunnel is started by root
setuid = root
setgid = admin

; PID file is created inside the chroot jail (if enabled)
pid = /usr/local/var/run/stunnel.pid

; Debugging stuff (may be useful for troubleshooting)
;foreground = yes
debug = 7
output = /usr/local/var/log/stunnel.log

; 定义一个服务
[squid-proxy]
; 作为一个stunnel客户端
client = yes
; 监听3128端口,那么用户浏览器的代理设置就是 stunnel-client-ip:3128
accept = 3128
; 要连接到的stunnel server的ip与端口
connect = xxx.xxx.xxx.xxx:3129
; 需要验证对方发过来的证书
verify = 2
; 用来进行证书验证的文件(里面有stunnel server的证书)
CAfile = /usr/local/etc/stunnel/stunnel-server.pem
; It is recommended to drop root privileges if stunnel is started by root
setuid = root
setgid = admin
; PID file is created inside the chroot jail (if enabled)
pid = /usr/local/var/run/stunnel.pid
; Debugging stuff (may be useful for troubleshooting)
;foreground = yes
debug = 7
output = /usr/local/var/log/stunnel.log
; 定义一个服务
[squid-proxy]
; 作为一个stunnel客户端
client = yes
; 监听3128端口,那么用户浏览器的代理设置就是 stunnel-client-ip:3128
accept = 3128
; 要连接到的stunnel server的ip与端口
connect = xxx.xxx.xxx.xxx:3129
; 需要验证对方发过来的证书
verify = 2
; 用来进行证书验证的文件(里面有stunnel server的证书)
CAfile = /usr/local/etc/stunnel/stunnel-server.pem
; It is recommended to drop root privileges if stunnel is started by root setuid = root setgid = admin ; PID file is created inside the chroot jail (if enabled) pid = /usr/local/var/run/stunnel.pid ; Debugging stuff (may be useful for troubleshooting) ;foreground = yes debug = 7 output = /usr/local/var/log/stunnel.log ; 定义一个服务 [squid-proxy] ; 作为一个stunnel客户端 client = yes ; 监听3128端口,那么用户浏览器的代理设置就是 stunnel-client-ip:3128 accept = 3128 ; 要连接到的stunnel server的ip与端口 connect = xxx.xxx.xxx.xxx:3129 ; 需要验证对方发过来的证书 verify = 2 ; 用来进行证书验证的文件(里面有stunnel server的证书) CAfile = /usr/local/etc/stunnel/stunnel-server.pem
4. 启停stunnel
启动:
sudo stunnel

停止:
sudo kill <code>{{EJS3}}</code>
启动:
sudo stunnel
停止:
sudo kill <code>{{EJS3}}</code>
启动:
sudo stunnel
停止:
sudo kill <code>{{EJS3}}</code>