Source installation and running
Although Odoo provides packaged installers for convenience, I prefer to download the source code and run it directly. You can check out the official document from Odoo for source installation.
Download source code
First, go to the directory you want to store your project, download the source code of Odoo 17 from GitHub
cd /var/www/
git clone https://github.com/odoo/odoo.git --depth 1Note: You’d better use the argument --depth to avoid fetching early commits because the entire repository of Odoo is too big now (more than 8 GB so far).
Install dependencies and create a virtual environment
sudo apt install python3-pip python3-venv libldap2-dev libpq-dev libsasl2-dev

cd odoo
python3 -m venv .venv
source .venv/bin/activate
pip install wheel
pip install -r requirements.txt
Create a database user
Before this step, you should install PostgreSQL (version 12.0 or above).
sudo apt install postgresql postgresql-clientBy default, PostgreSQL will create a database superuser named postgres and create an OS login user with the same name. However, Odoo forbids connecting PostgreSQL database with the user postgres. We have to create a new PostgreSQL user.
sudo -u postgres createuser -d -R -S odoo17 --pwprompt
sudo -u postgres createdb odoo17

# try login as new db user
psql -U odoo17 -h localhost- The
-dargument ofcreateusermeans the new user will be allowed to create databases. - The
-Rargument means the new user will not be allowed to create new roles (This is the default). - The
-Sargument means the new user will not be a superuser (This is the default). - The
--pwpromptargument means to display a prompt for the password.
If the PostgreSQL user has the same name as the Unix login user, connecting to PostgreSQL without a password is possible.
In this article, I won’t create a new OS login user named odoo17. I want to run the Odoo by the user www-data. So, I have to create the PostgreSQL user with a password.
Try running Odoo in CLI
./odoo-bin --db_user odoo17 --db_password xxx --db_host localhost -p 8443Type this command into CLI to run the Odoo listening port 8443 (It should be 8069 by default), and then you can access the Odoo website via the URL http://host-ip:8443.
Running Odoo as a system service
Create an Odoo configuration file
Now, we can create a .conf file for Odoo configuration (config details).
# /etc/odoo17.conf
[options]
admin_passwd = Your_Odoo_Master_Password

db_host = localhost

db_user = odoo17

db_password = odoo17

http_port = 8069

data_dir = /var/www/odoo-data

logfile = /var/log/odoo/odoo17.log
# log_level = debug

# proxy_mode = True  # Enable proxy mode if you deploy Odoo behind a reverse proxy (like Nginx), default False

# list_db = False # Disable Odoo database manager pages, default TrueNote: You may encounter an error message saying “PermissionError: [Errno 13] Permission denied: ‘/var/www/.local'” if you didn’t specify data_dir and run Odoo by the user www-data. That’s because Odoo will create a directory ~/.local/share/Odoo for data storage, while www-data may have no permission to create a subfolder in /var/www/.
Then, we need to create a directory for Odoo logs and data.
sudo mkdir /var/log/odoo
sudo chown www-data:www-data /var/log/odoo

sudo mkdir /var/www/odoo-data  # It's just a simple demonstration, you'd better rearrange this directory
sudo chwon www-data:www-data /var/www/odoo-data
Create an Odoo systemd unit file
# /etc/systemd/system/odoo.service
[Unit]
Description=Odoo 17
After=network.target postgresql.service

[Service]
Type=simple
SyslogIdentifier=odoo17
PermissionsStartOnly=true
User=www-data
Group=www-data
ExecStart=/var/www/odoo/.venv/bin/python3 /var/www/odoo/odoo-bin -c /etc/odoo17.conf
StandardOutput=journal+console

[Install]
WantedBy=multi-user.target
Reload the systemd and run the Odoo service
sudo systemctl daemon-reload
sudo systemctl start odoo
sudo systemctl enable odoo
Configure Nginx as a reverse proxy for Odoo
Before this step, you should have installed Ningx service and had some basic knowledge of Nginx configuration.
Odoo uses Werkzeug as a WSGI (Web Server Gateway Interface) service by default, so we can refer to the official document by Werkzeug: deployment/nginx.
# /etc/nginx/sites-enabled/odoo.conf
server {
    listen 80;
    server_name _;

    location / {
        proxy_pass http://127.0.0.1:8069/;
        proxy_set_header X-Forwarded-For   $proxy_add_x_forwarded_for;
        proxy_set_header X-Forwarded-Proto $scheme;
        proxy_set_header X-Forwarded-Host  $host;
        proxy_set_header X-Forwarded-Prefix /;
    }
}
In my personal practice, I will also configure HTTPS for the Odoo website, so my configuration file is like this:
# /etc/nginx/sites-enabled/odoo.conf
upstream odoo_server {
    server 127.0.0.1:8069;
}

server {
    listen                  443 ssl http2;
    listen                  [::]:443 ssl http2;
    server_name             odoo.hawu.me;

    # SSL
    ssl_certificate         /etc/letsencrypt/live/odoo.hawu.me/fullchain.pem;
    ssl_certificate_key     /etc/letsencrypt/live/odoo.hawu.me/privkey.pem;
    ssl_trusted_certificate /etc/letsencrypt/live/odoo.hawu.me/chain.pem;

    # security
    include                 nginxconfig.io/security.conf;

    # logging
    access_log              /var/log/nginx/odoo.access.log combined buffer=512k flush=1m;
    error_log               /var/log/nginx/odoo.error.log warn;

    location / {
        proxy_pass            http://odoo_server;
    }

    location ~ ^/web/database {
        proxy_pass            http://odoo_server;
        allow 192.168.1.100;        # Allow a specified IP access
        deny all;                   # Deny all other IP access
    }

    # Proxy headers
    proxy_set_header X-Forwarded-For   $proxy_add_x_forwarded_for;
    proxy_set_header X-Forwarded-Proto $scheme;
    proxy_set_header X-Forwarded-Host  $host;
    proxy_set_header X-Forwarded-Prefix /;

    proxy_set_header Upgrade           $http_upgrade;
    proxy_set_header X-Real-IP         $remote_addr;
    proxy_set_header X-Forwarded-Port  $server_port;

    # Proxy timeouts
    proxy_connect_timeout              60s;
    proxy_send_timeout                 60s;
    proxy_read_timeout                 60s;

    # additional config
    include nginxconfig.io/general.conf;
}

# HTTP redirect
server {
    listen      80;
    listen      [::]:80;
    server_name odoo.hawu.me;
    include     nginxconfig.io/letsencrypt.conf;

    location / {
        return 301 https://odoo.hawu.me$request_uri;
    }
}
Restart the Nginx, and now you can access the Odoo website at https://odoo.yourdomain.com.
Security❗
This section is important if you plan to expose your Odoo system to the Internet. You must know how to hide your Odoo database manager page, which should only be accessible to administrators. You must also know how to prevent malicious brute-force login attempts.
Protecting Odoo DB manager pages
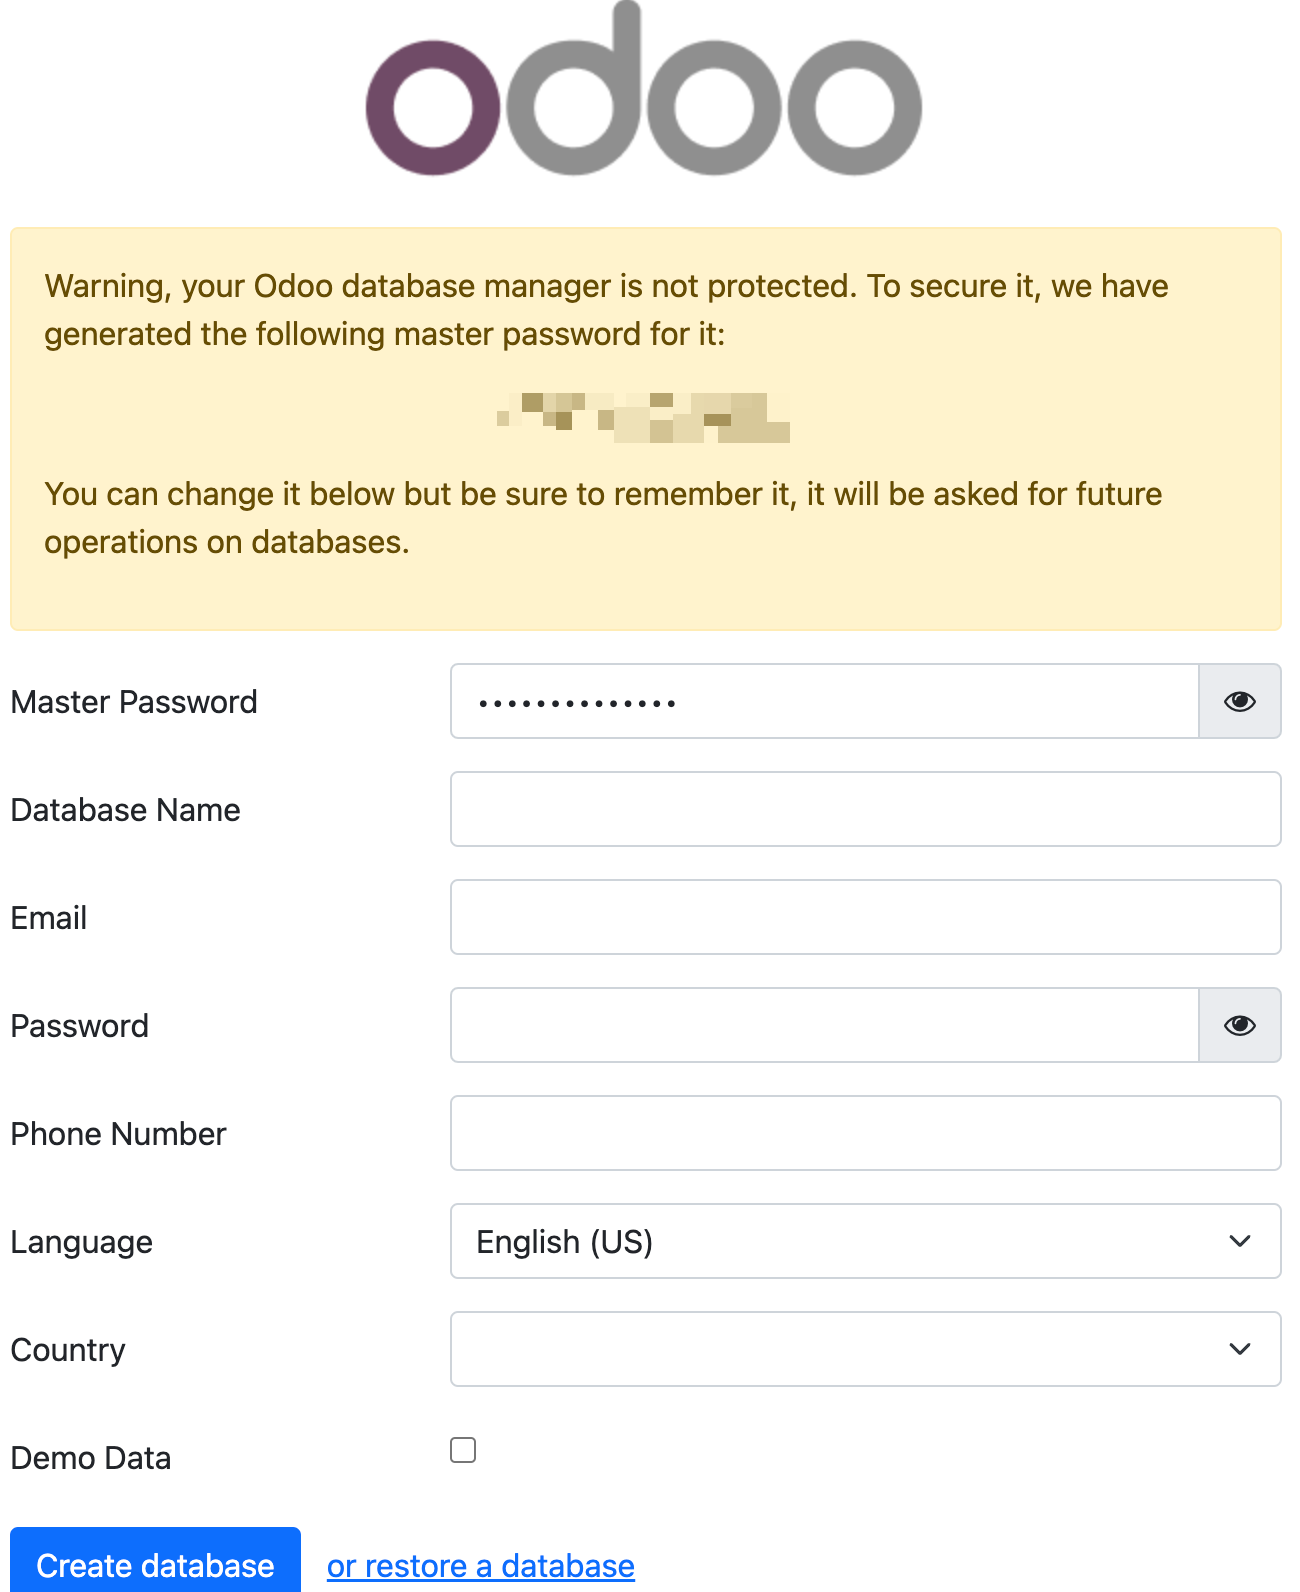
Odoo is a multi-tenant system, which means a single Odoo system may run and serve a number of database instances. You can understand that each Odoo database corresponds to an independent company or website. Odoo provides pages to manage databases, as shown below.

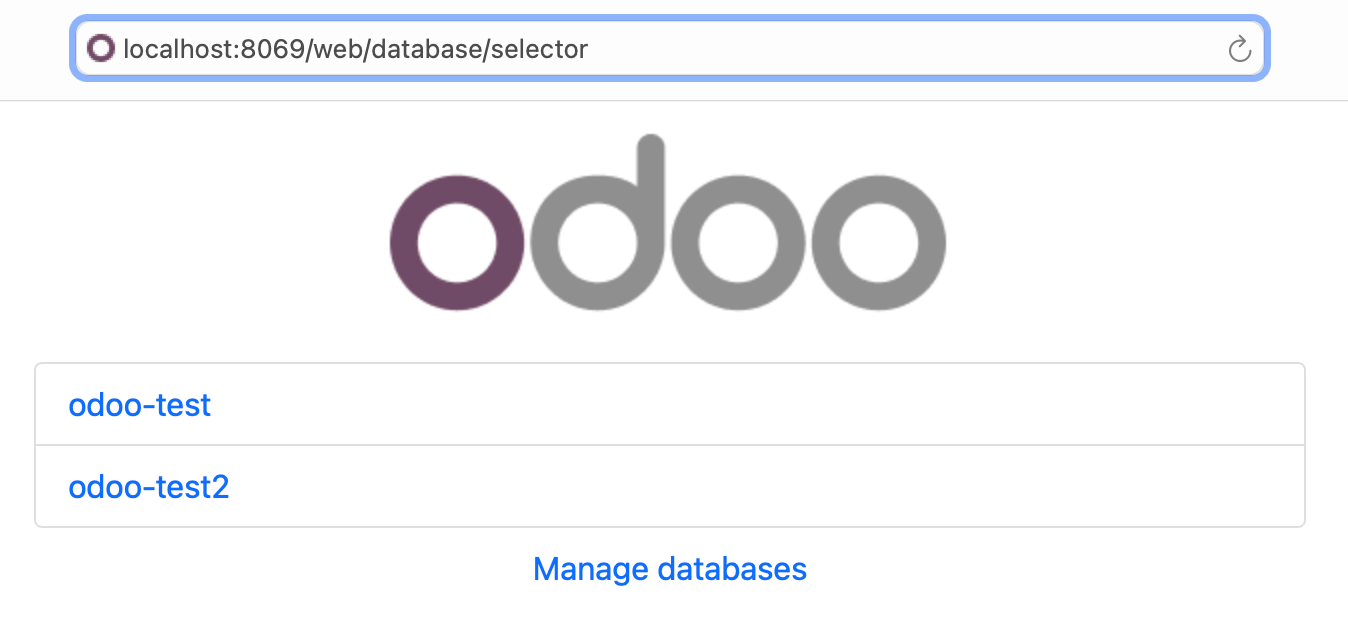
You never want these pages exposed on the Internet. So, there are two methods to hide these pages.
Method 1: use the CLI argument --no-database-list
Odoo provides a CLI argument --no-database-list to disable the database management pages. You can run odoo-bin with this CLI argument or set the configuration option list_db to False in the configuration file.
# /etc/odoo17.conf
list_db = False
Method 2: use Nginx configuration
However, you may just want to prevent external users from accessing the Odoo DB manager pages rather than disabling them completely. You can utilize the Nginx configuration to achieve this goal.
location ~ ^/web/database {
    proxy_pass                  http://127.0.0.1:8069;
    allow 192.168.1.100;        # Allow a specified IP access
    allow 192.168.1.0/24;       # Allow a subnet access
    deny all;                   # Deny all other IP access
}
Protecting against brute-force login attempts
Odoo has no built-in protection against brute-force attacks. It suggests blocking brute-force attacks by fail2ban. Refer to blocking-brute-force-attacks.